AIRBRUSH ARTWORKDan's Airbrushing
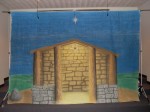
Having found a Pasche Air Brush at a yard sale for $5.00, I decided to give airbrushing a try. Until I did the Yard sign below, (the last image), I had never used an airbrush before, and wasn't sure what the end results would be like. By the time I finished side one of the sign, I had pretty much figured out how to use the airbrush, at least on wood, then I began to experiment on muslin. For painting on muslin, instead of purchasing the expensive Airbrush paints, I used Delta Ceramcoat, it seemed to be the only hobby acrylic available to me at the time that didn't have bugers that would clog the airbrush. Using a paint bottle I would dilute the paint about 3:1 with water, (water being the 3), and sometimes even more dilute than this. The largest painting you see below has maybe 6-8 ounces of paint to do the entire painting. As you can see, other than the cost of the material, it is a very inexpensive way to express yourself. However, painting on solid surfaces, in some instances airbrush paints work much better. This is not always the case, as the yard sign at the bottom was done using the diluted acrylic method.
I have since then purchased a new Airbrush, a Paasche VLST Pro from Dick Blick Art Materials, and am quite pleased with the equipment and the service.
| ||||||
| ART AND ARTIST GOURDS In Music, Art, and Theatre MUSIC |
Music And The Arts - HOME About Us Artist Carmella Mae Dunkin Awareness Ribbons Dan Dunkin Art Graphic Arts Art Styles Art Terms And Deffinitions Art Mediums Costumes Different Types Of Art Gourds In Music Gourd Instruments Shekeres' Gourd Instrument Videos Gourds As Art Gourd Artist Showcase Musicals Godspell Godspell The Movie Godspell Lyrics Act 1 Act 2 Godspell Pics High School Musical High School Musical Original Cast List High School Musical Song Lyrics High School Musical 2 Cast High School Musical 2 Song Lyrics Phantom Of The Opera Music Resources Promoting Your Music Vocal Lessons and Coaching Links Shopping Mall
Affiliate Resources R US / Carmella's Place / Carmella Mae Originals / Daily Sales Online / Dano's Place / Everything Makes Scents / Family Friendly Forums / Music and The Arts / The Dunkin Academy / The Gourd Reserve / The Joy Of Hope Foundation


